Step 1: Downloading UPAN Download Utility
Download UPAN_Download_Utility.zip from the official source
Save the file to a convenient location on your PC.
Step 2: Extracting the Utility
Locate UPAN_Download_Utility.zip in your downloads folder.
Right-click the file and select Extract All….
Choose the destination folder where you want to extract the files.
Click Extract and wait for the process to complete.
Step 3: Checking Extracted Files
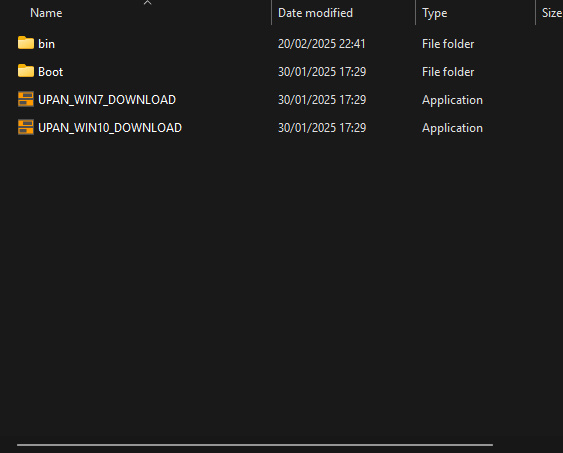
Once extracted, you should see the following files and folders:
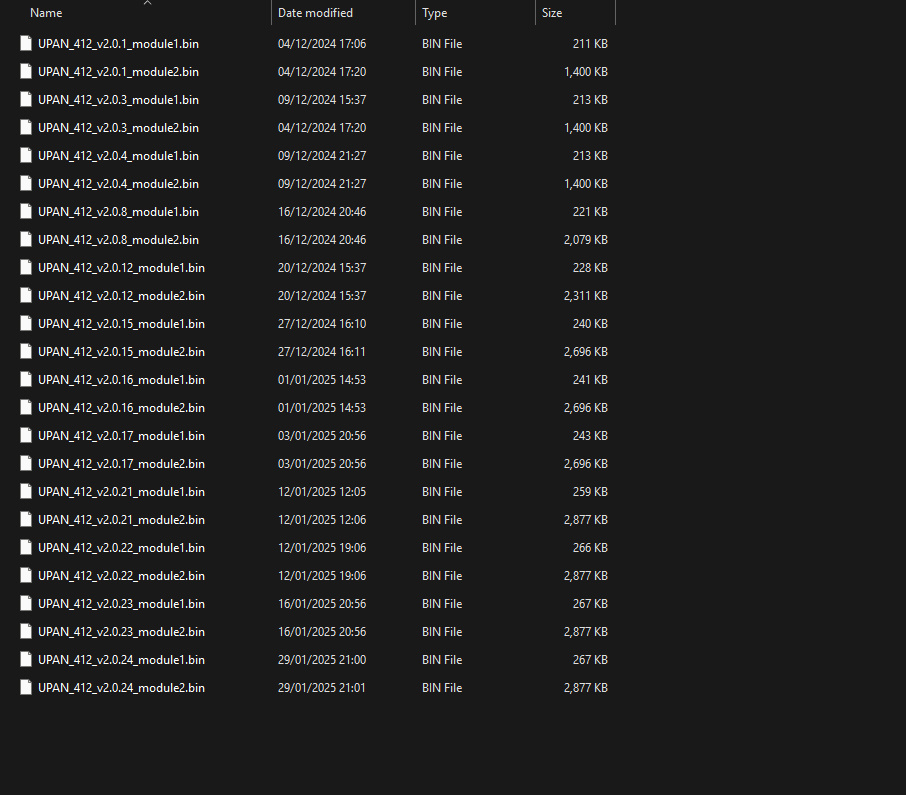
bin(Folder) – This folder contains the working firmware files. Each firmware version consists of two files: module 1 and module 2. The filenames include the firmware version number (e.g.,UPAN_412_v2.0.28_module1.binandUPAN_412_v2.0.28_module2.bin). To properly flash the firmware, ensure that both files with the same version number are placed in this folder.Boot(Folder) – This folder contains the bootloader firmware. It is only needed when upgrading from older versions of the controller to modern firmware.UPAN_WIN7_DOWNLOAD(Application)UPAN_WIN10_DOWNLOAD(Application)

Now, you are ready to use the UPAN Download Utility!
Step 1: Preparing for Bootloader Update
Ensure that you have installed STM32CubeProgrammer and extracted UPAN Download Utility.
Connect the UPAN controller to your PC using a USB Type-C cable.
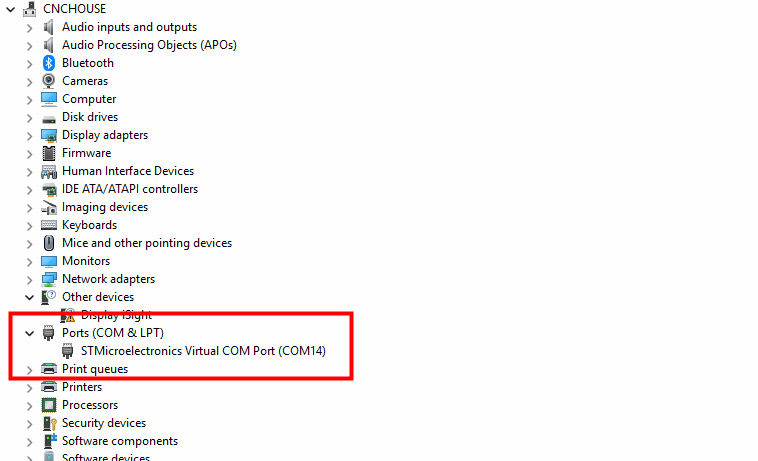
Ensure that the device is detected in Device Manager under the correct COM port.
Step 2: Entering Bootloader Mode
Power off the UPAN controller.
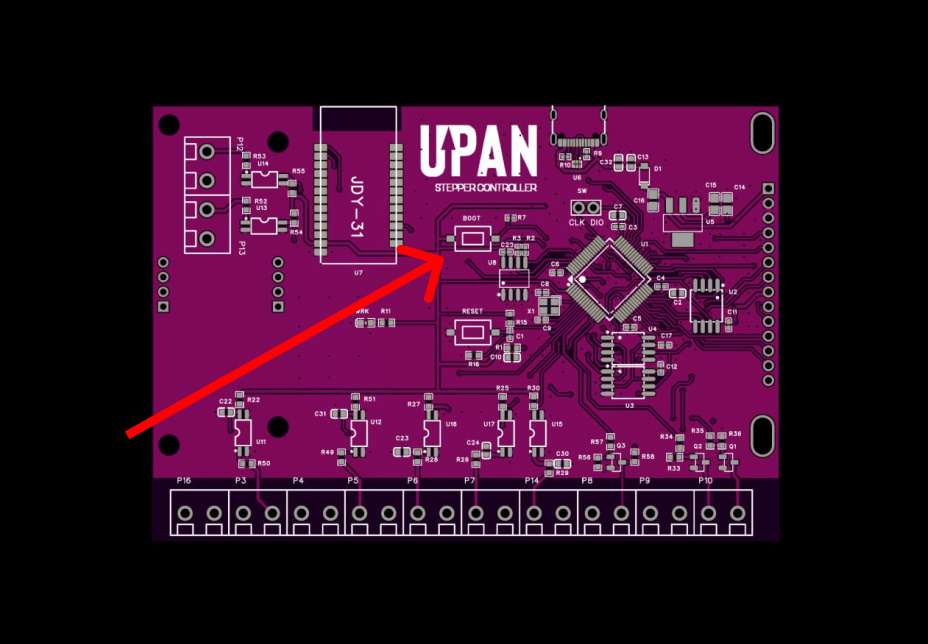
Press and hold the Boot button on the controller.
While holding the Boot button, power on the device.
Release the Boot button after a few seconds.
Step 3: Flashing the New Bootloader
Open STM32CubeProgrammer.
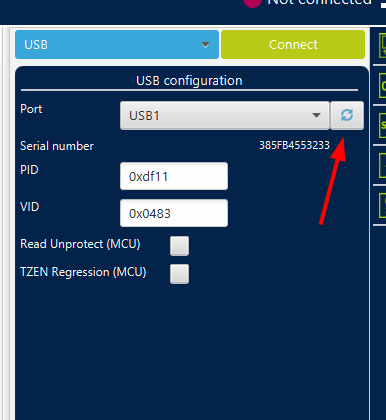
In the top-right corner, select USB instead of the default UART connection.
Click the Refresh button and ensure that the correct USB port is selected in the Port field.
Click Connect to establish communication with the controller
Erasing the Chip
Before installing a new bootloader, you must completely erase the chip.
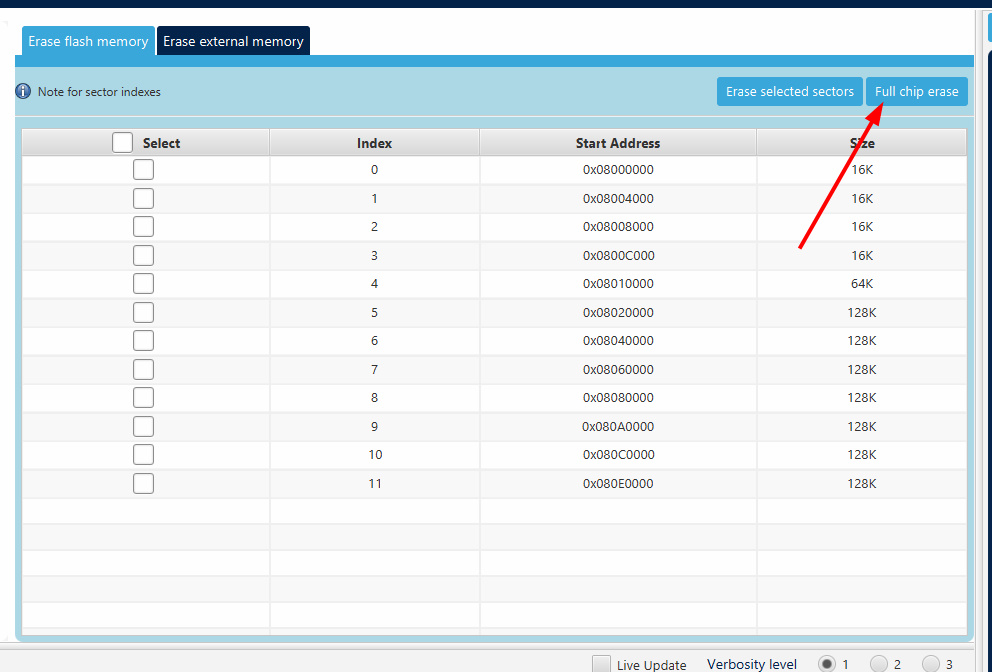
Click Full Chip Erase to completely erase the flash memory.
Wait for the process to complete before proceeding with bootloader installation.
Navigate to the Erasing & Programming tab.
Click Browse and select the bootloader file (
.binor.hex). The bootloader file is located in the Boot folder inside the extracted UPAN Download Utility directory.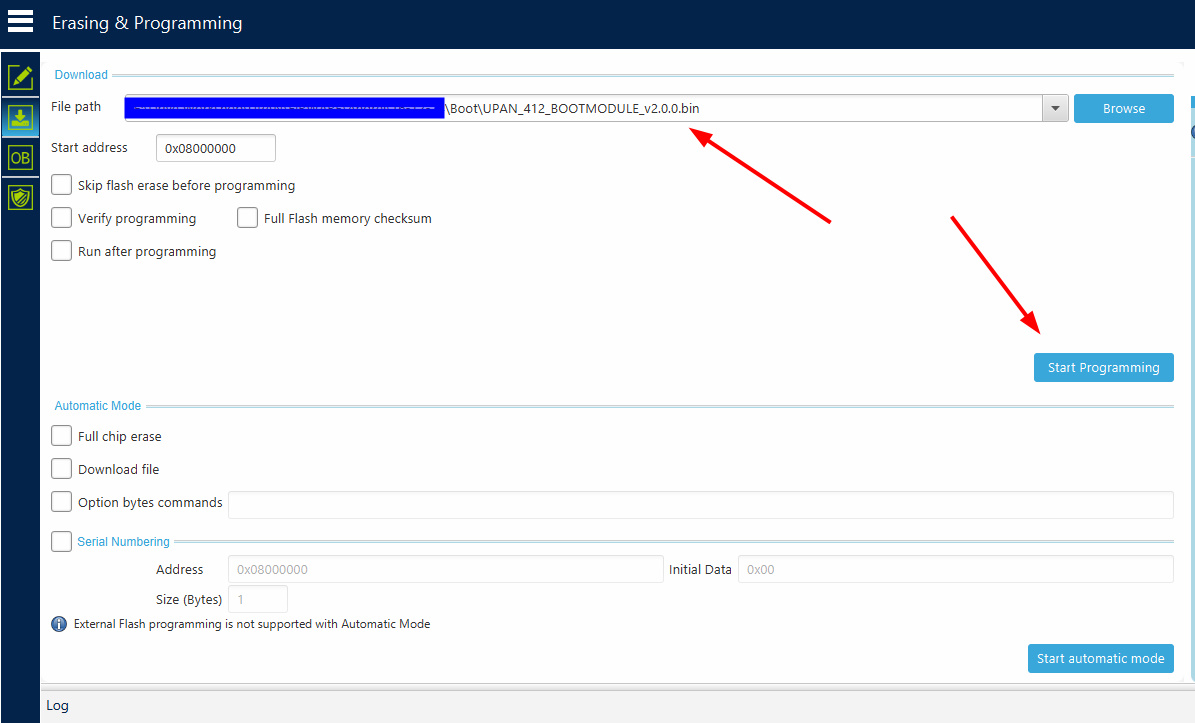
Click Start Programming and wait for the process to complete.
Step 4: Verifying the Bootloader Update
After programming, disconnect and reconnect the controller.
In the downloaded archive (UPAN_Download_Utility), locate and open UPAN_WIN10_DOWNLOAD (Application)
You may need to run it as an administrator
Select the COM port to which the UPAN controller is connected.
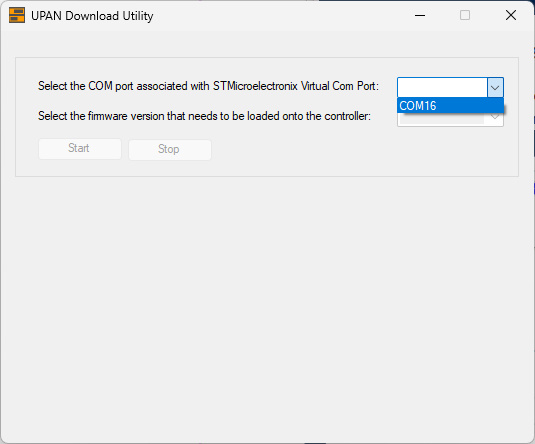
If the firmware selection window shows 255.255.255, this means the main firmware is not loaded.
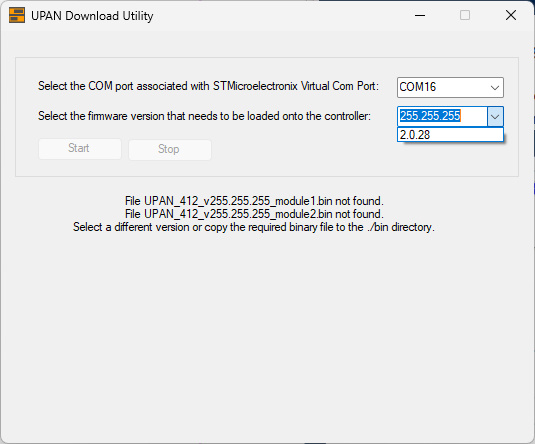
Otherwise, your current firmware version will be displayed.
For instructions on updating the firmware, refer to the section ‘How to Update Firmware’.
Step 1: Preparing for Firmware Installation
Ensure that you have successfully updated the bootloader (refer to ‘How to Update the Bootloader’).
Connect the UPAN controller to your PC using a USB Type-C cable.
Open the UPAN Download Utility (
UPAN_WIN10_DOWNLOADapplication).Run the application as an administrator if needed.
Step 2: Selecting the Firmware
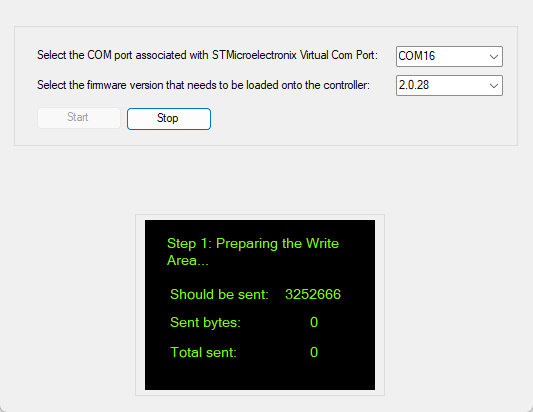
In the UPAN Download Utility, select the COM port associated with the UPAN controller.
From the firmware selection dropdown, choose the correct firmware version.
If 255.255.255 is displayed, this means the main firmware is missing or needs to be reinstalled.
Step 3: Flashing the Firmware
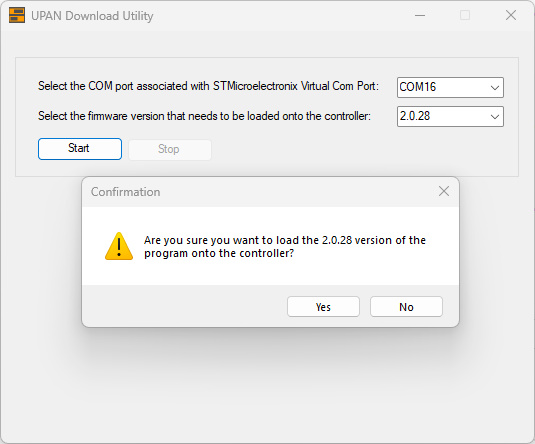
Click Start to begin the firmware installation process. Confirm your action in the pop-up window.
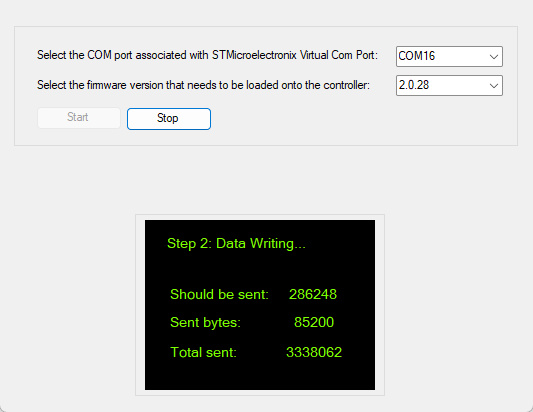
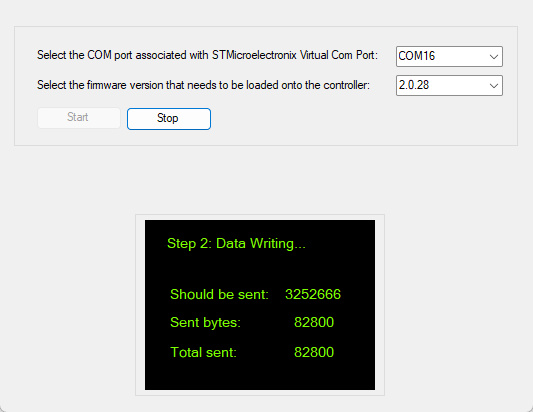
The controller screen will display a progress indicator.
Once the process is complete, a Reboot button will appear on the UPAN controller.
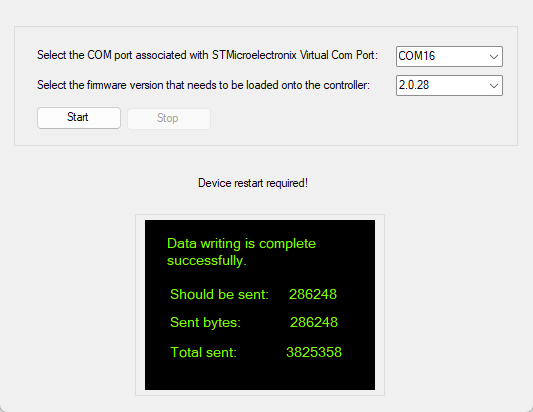
Press the Reboot button to load the updated firmware.
Wait for the process to complete. Do not disconnect the controller during flashing.
Once completed, restart the UPAN controller by unplugging and reconnecting it.
Step 4: Verifying the Firmware Installation
Open UPAN Download Utility and check if the firmware version is now correctly displayed.
If the controller functions properly, the firmware installation was successful.
Your UPAN controller is now updated and ready for use!